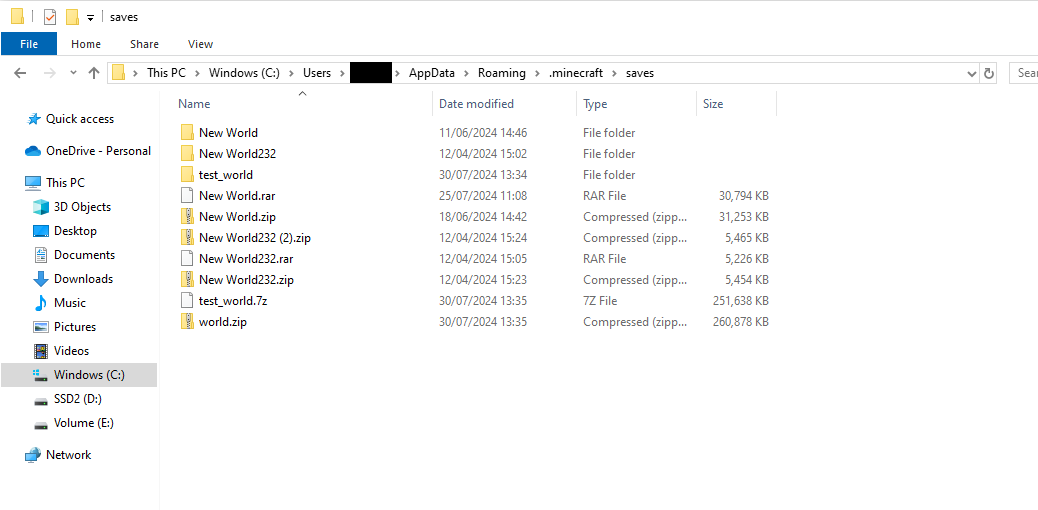
Locate Your World on Your PC
The easiest way to find your Minecraft world folder is by typing the following into your File Explorer:
%appdata%\.minecraft\savesThis will take you directly to the folder where your saved worlds are stored. Identify the world you want to upload

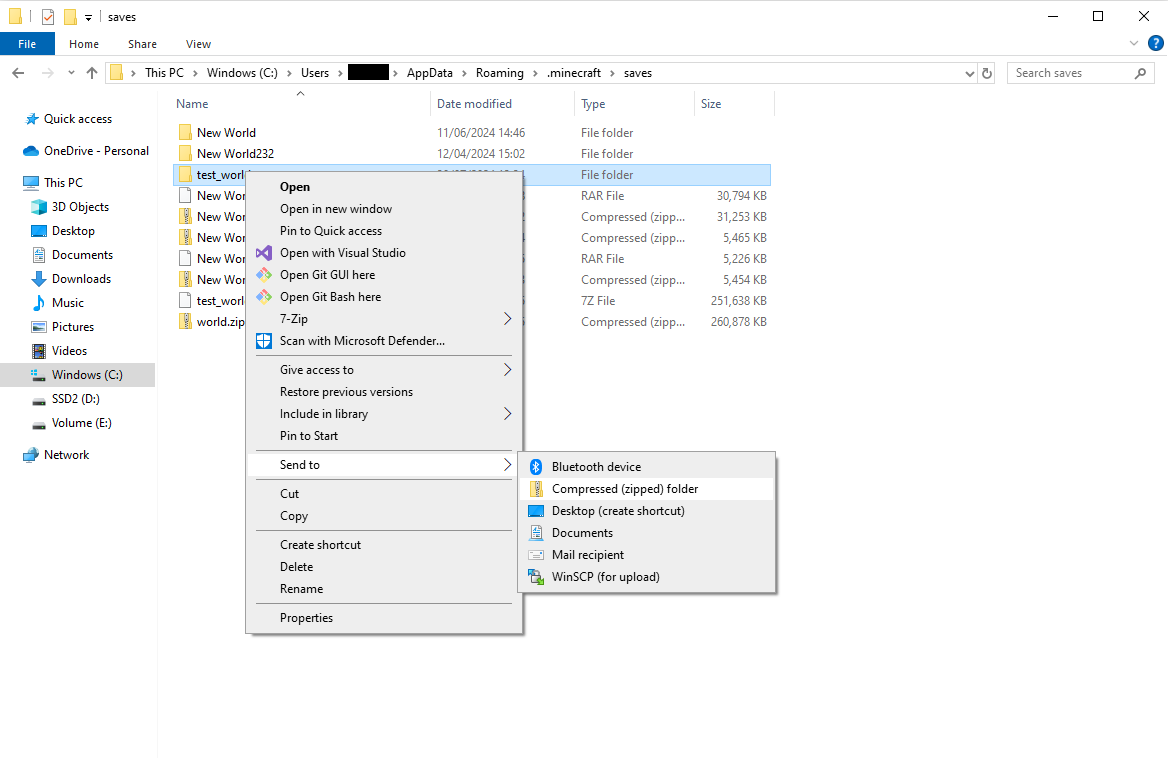
Convert Your World Folder to a .zip File
Right-click on the world folder you want to upload and select Compress to ZIP file (or a similar option depending on your operating system). Ensure that the entire world folder is included in the .zip file.
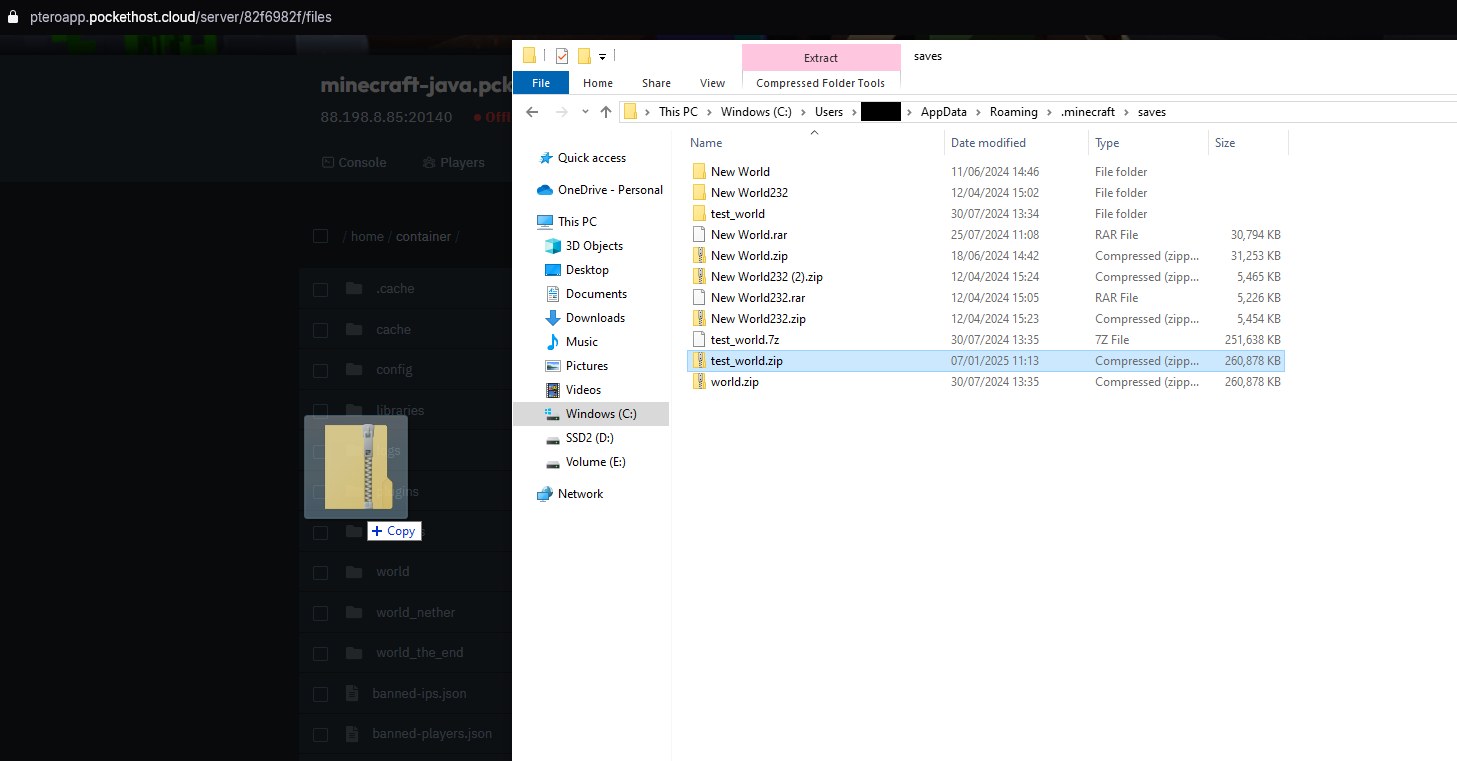
Upload the .zip File to the File Tab of Your Server
Log into your server's control panel, navigate to the File Tab, and upload the .zip file you created.
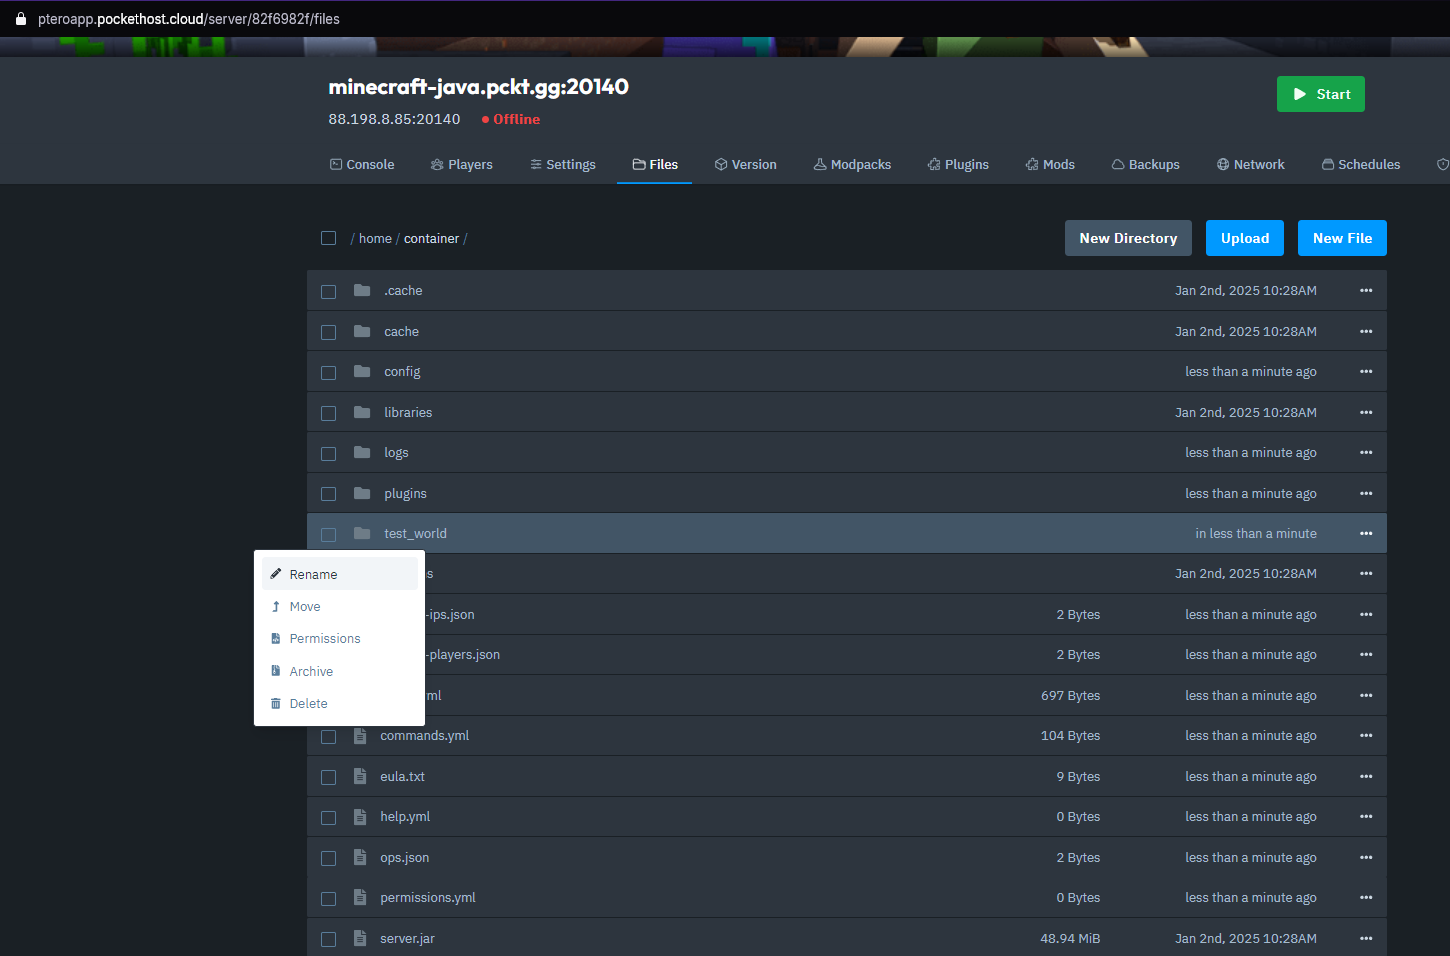
Delete or Rename Your Old World Folders
Before unarchiving your new world, you need to either delete or rename the existing world folders on your server. If you want to keep a backup, archive them first and then download the archive to your PC.
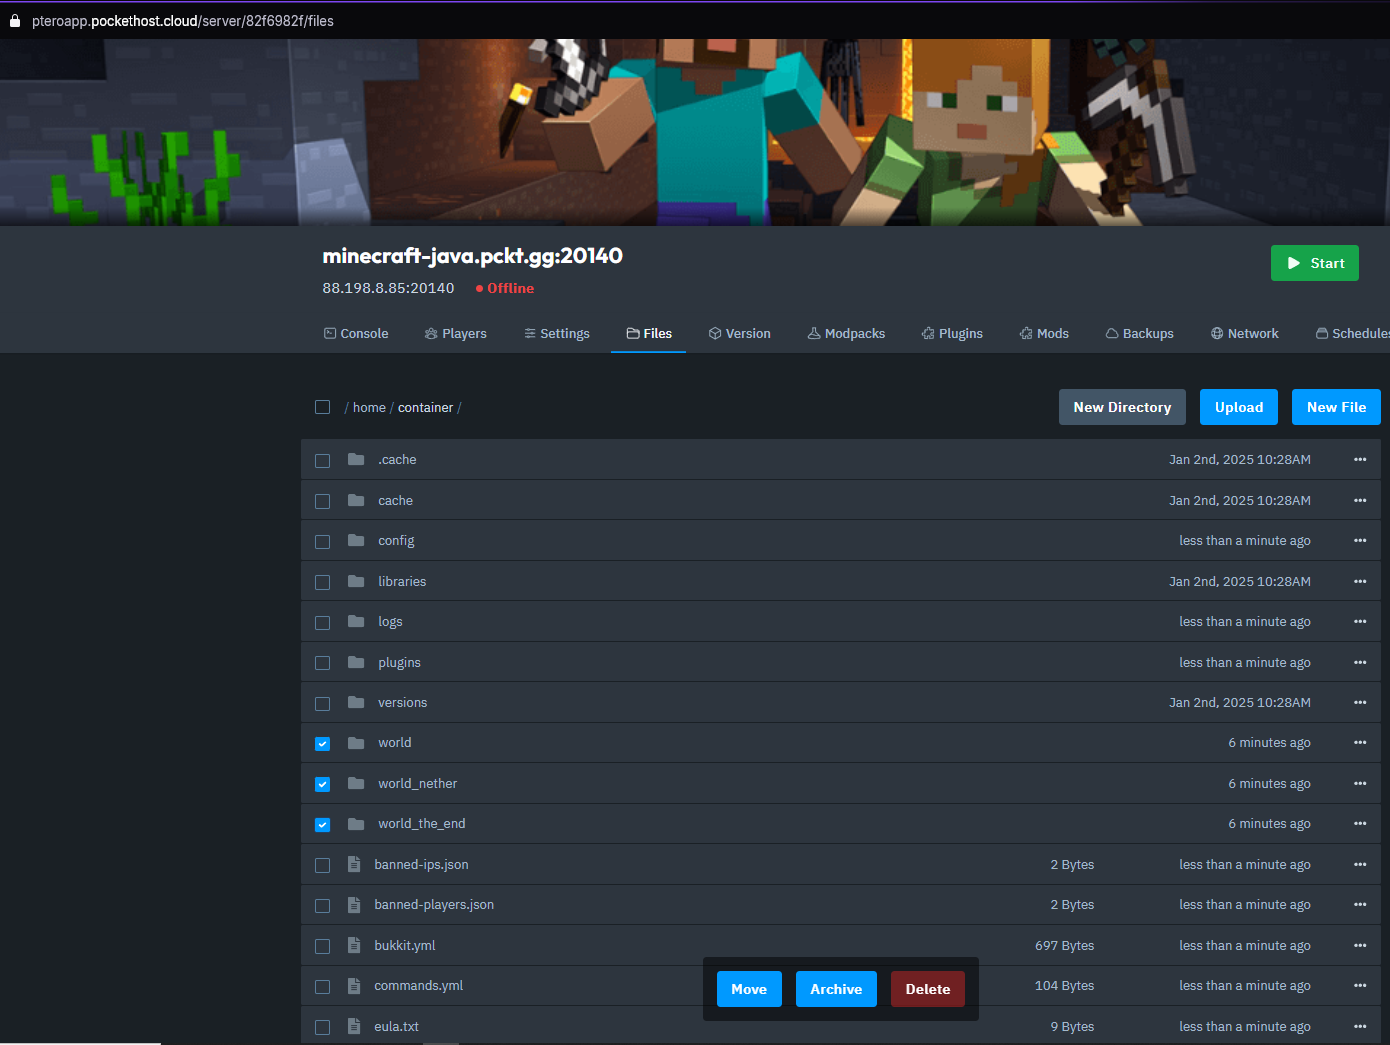
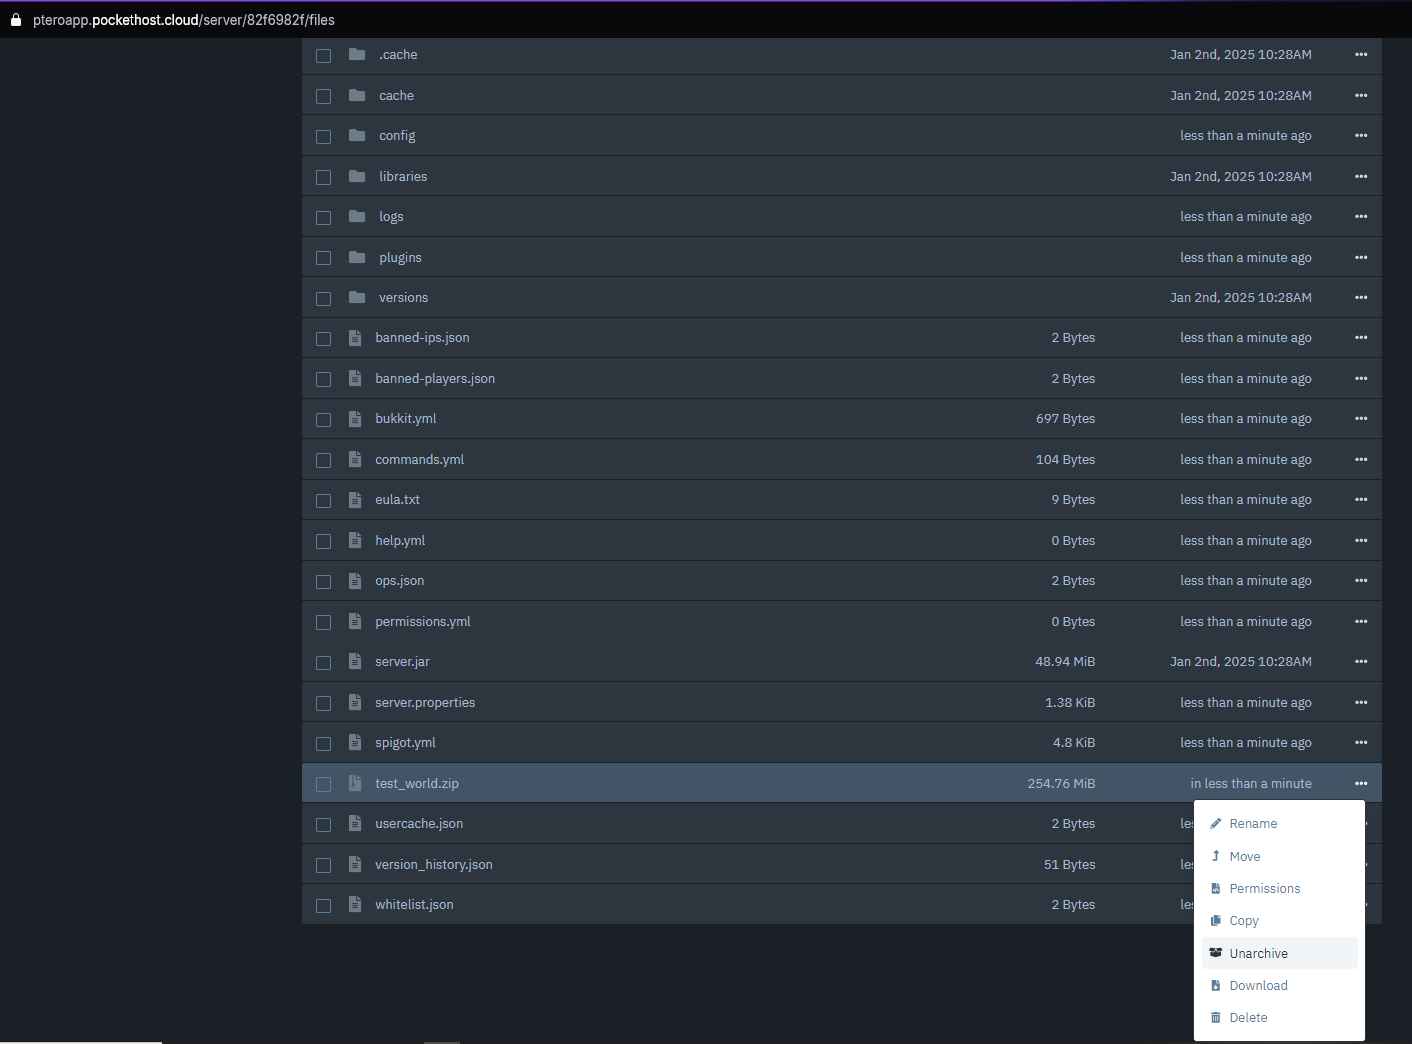
Unarchive Your Uploaded World
Once the .zip file is uploaded, use your server's control panel to unarchive (extract) the world folder. This will unpack your world files onto the server.
Rename Your Uploaded World to "world"
For the server to load your new world by default, rename the uploaded world folder to world. Alternatively, you can change the level-name value in the server.properties file to match your uploaded world folder's name. However, this method requires more advanced configuration.

Start Your Server
Once everything is set up, start your server. If you're uploading a Vanilla world to a Paper server, the server will automatically generate world_nether and world_the_end folders based on your uploaded world folder.
Your world is now successfully uploaded and ready to play!