Guide: Install Simple Voice Chat on your xRealm server
With the Simple Voice Chat plugin, you can talk to your friends right in the game – no external programs needed.
Here you’ll find out, step by step, how to install and set up the plugin on your xRealm Minecraft server.
 Requirements
A running Minecraft server (Fabric, Forge, or Paper, depending on the plugin version)
Access to your xRealm server panel
The same mod/plugin must also be installed by all players who want to use voice chat!
 Step 1: Install plugin
Download the right version of Simple Voice Chat from Modrinth or CurseForge
→ Make sure the version matches your server version and mod loader (Fabric, Forge, Paper, etc.).
Upload the .jar file in the Server Panel → Files → plugins/ (or mods/ for Fabric/Forge).
Or use our “Plugins” tab to
Restart the server to load the plugin.
 Step 2: Configure Port
The plugin needs an extra port so voice chat works.
Open the tab “Network” in the Server Panel.
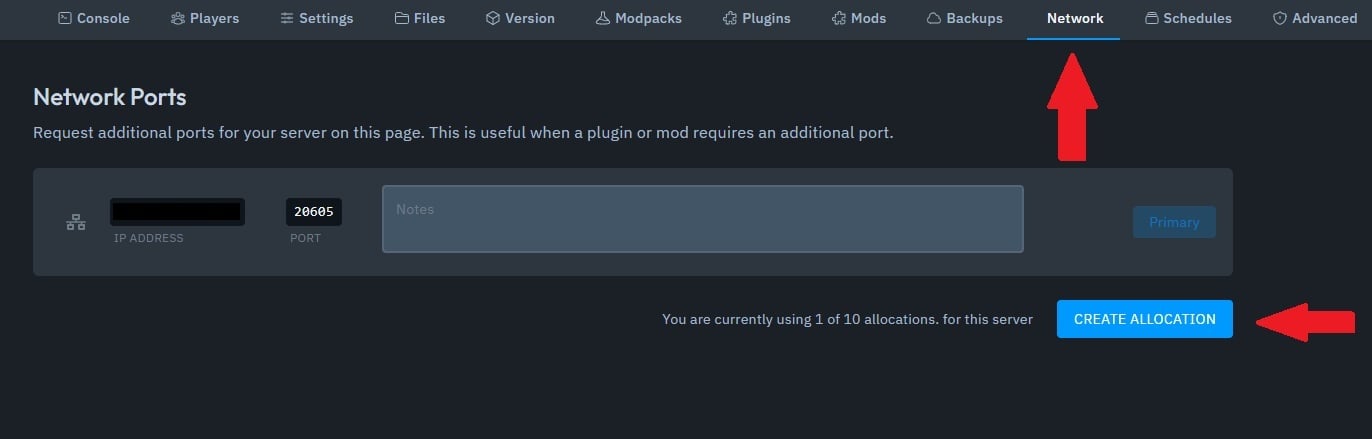
Click on “Add port” or “Generate new port”.
→ Make a note of the new port (e.g. 2457).

Open the folder in the file manager:
plugins/voicechat/
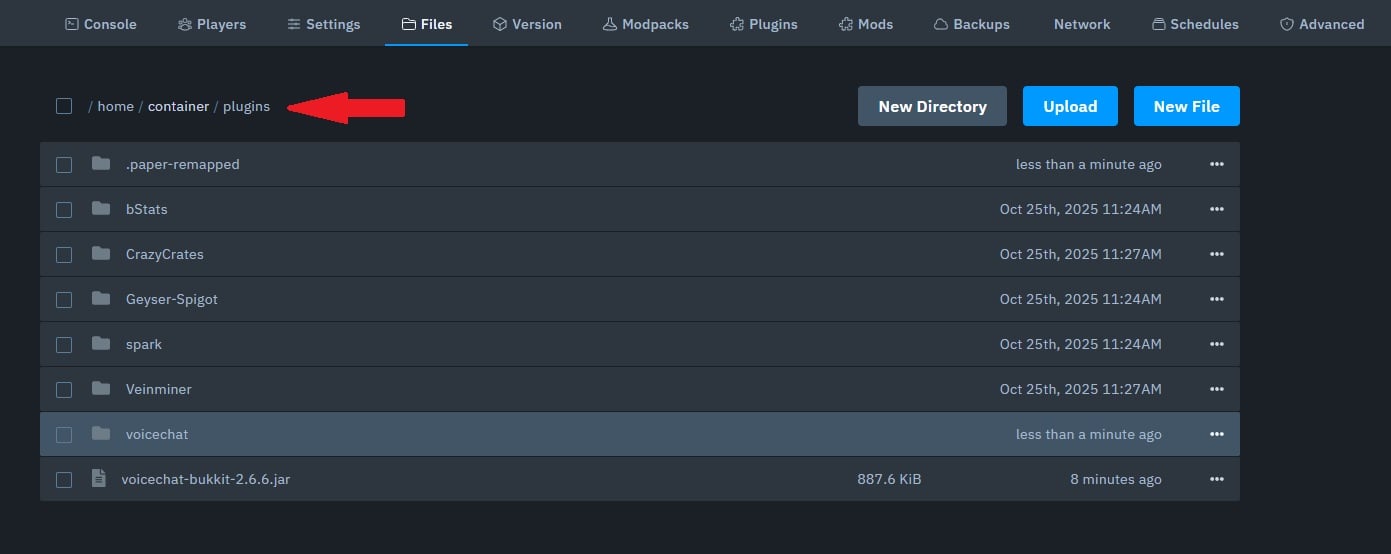
and edit the file voicechat-server.properties.
Enter the new port on the line port=, for example:
port=20851
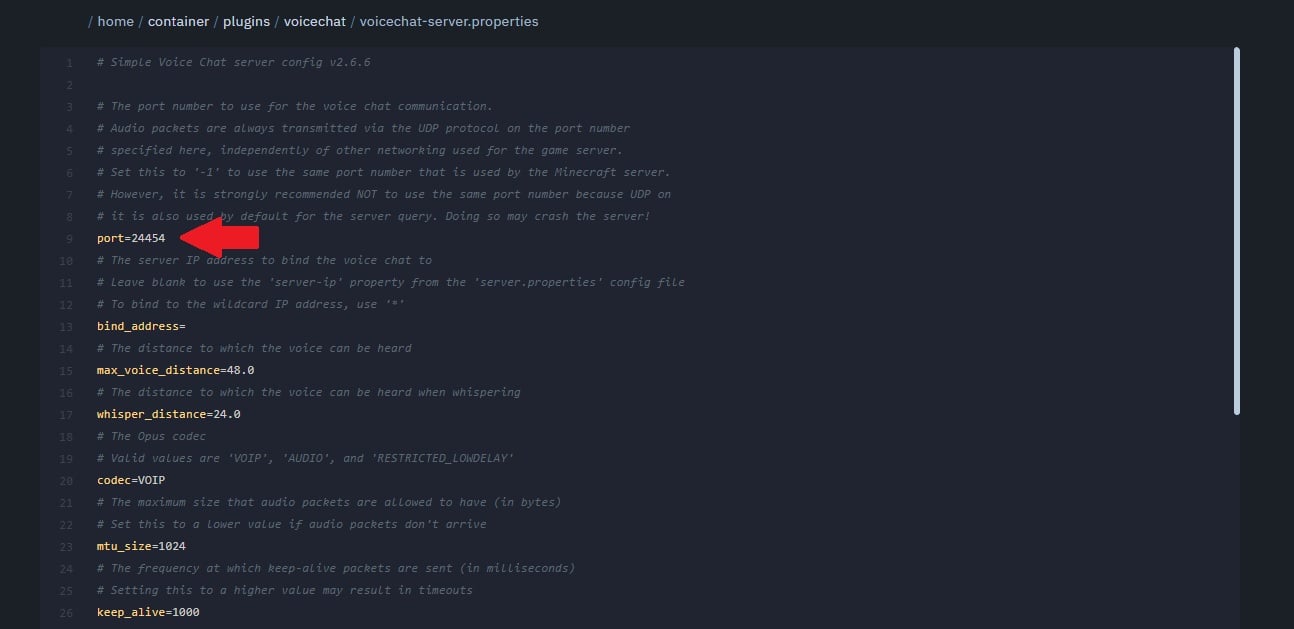
Save and restart the server.
 Done!
Done!If everything is set up correctly:
A microphone icon shows up in the lower right corner of the game.
You can talk by pressing V (default key).
Go to ESC → Options → Voice Chat to configure volume, microphone, and push-to-talk.
 Tip: If players can't connect to the voice chat, check the following:
That the port matches in both the config and the panel.
That the server was restarted after the change.
That everyone installed the same version of the plugin.